
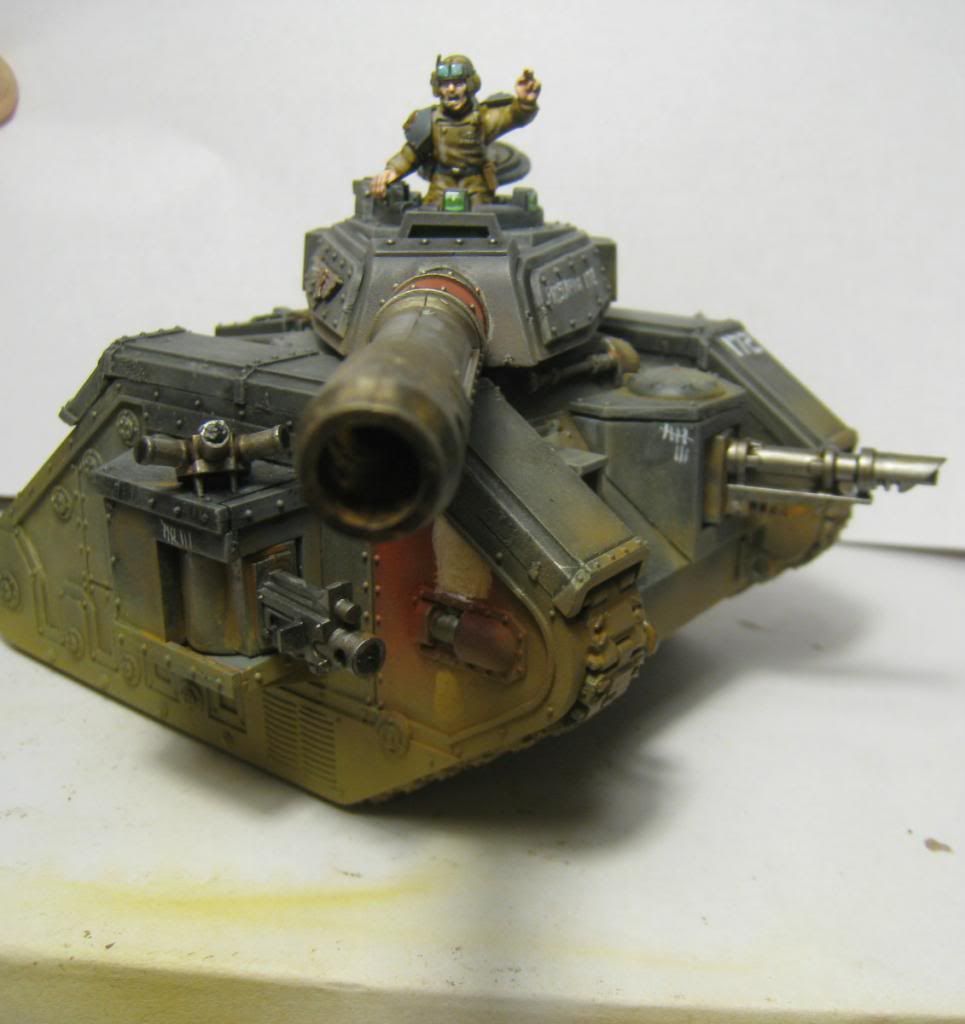
For a long time, I was satisfied with my ability to paint infantry, but not vehicles. I always felt like my armies’ tanks never quite were on the same level as the infantry models. A lot of that had to do with not knowing how to apply good weathering effects to them. Case and point, this Predator from my Lions Rampant Space Marines. There is some drybrushed brown around the tracks, but it's not really convincing, particularly on a vehicle that's painted white.
 |
So, I spent some time practicing my technique on various large models, figuring out what needed to be done differently from painting infantry. Painting
tanks is a totally different ball game than painting infantry, after all. Truly large flat
surfaces dominate these pieces, and a lot of the tricks and techniques that
make infantry models look good may not be especially applicable with vehicles. You can
painstakingly blend each armored panel on a tank, just as you could on a
smaller model, and have a brilliant looking finished product. But a vehicle
done this way, despite being technically very well painted, doesn’t look “real.”
Even armies which go to great lengths to maintain their equipment, such as
Imperial Space Marines, are going to end up with some chipped paint, grit, and
dirt on their vehicles, if only from just delivering them to the warzone.
The one thing I found was that an airbrush is ultimately a critical tool for really getting the most out of your vehicle models. For a long time, I was very resistant to buying an airbrush-- it felt like cheating to me, somehow. But despite several years of nay-saying airbrushing in favor of doing everything by hand, I have found that even a relatively inexpensive airbrush will drastically up the quality of your models without requiring much practice at all.
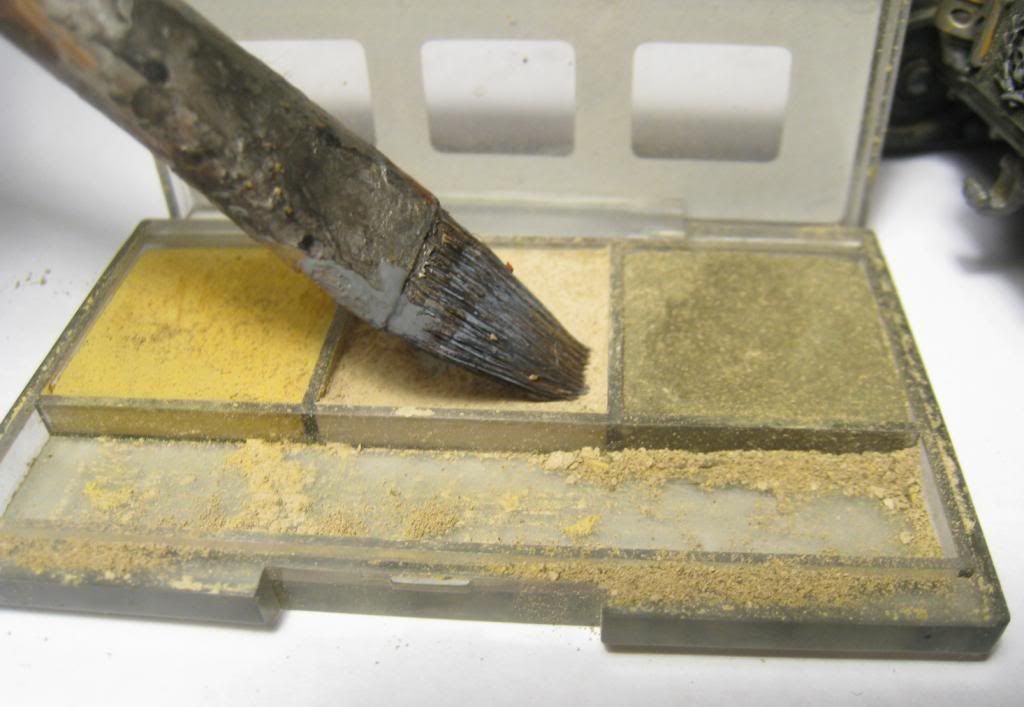 |
| Tamyia Weathering Master pigment set |
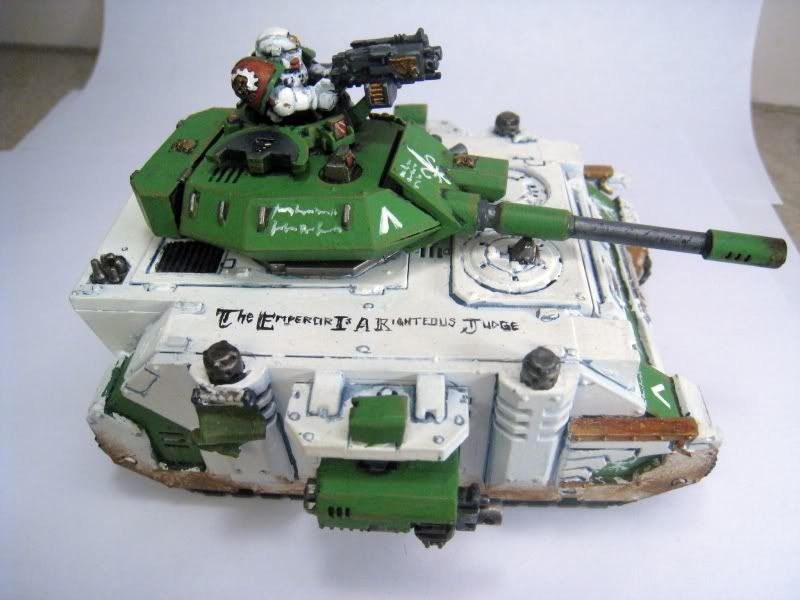
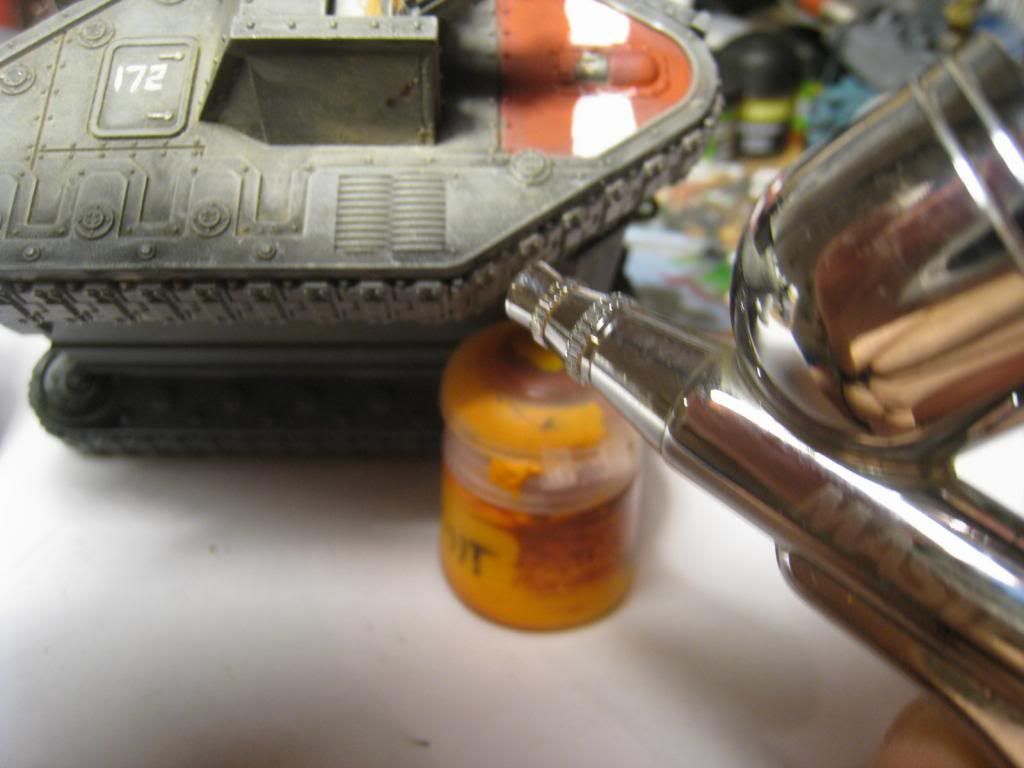
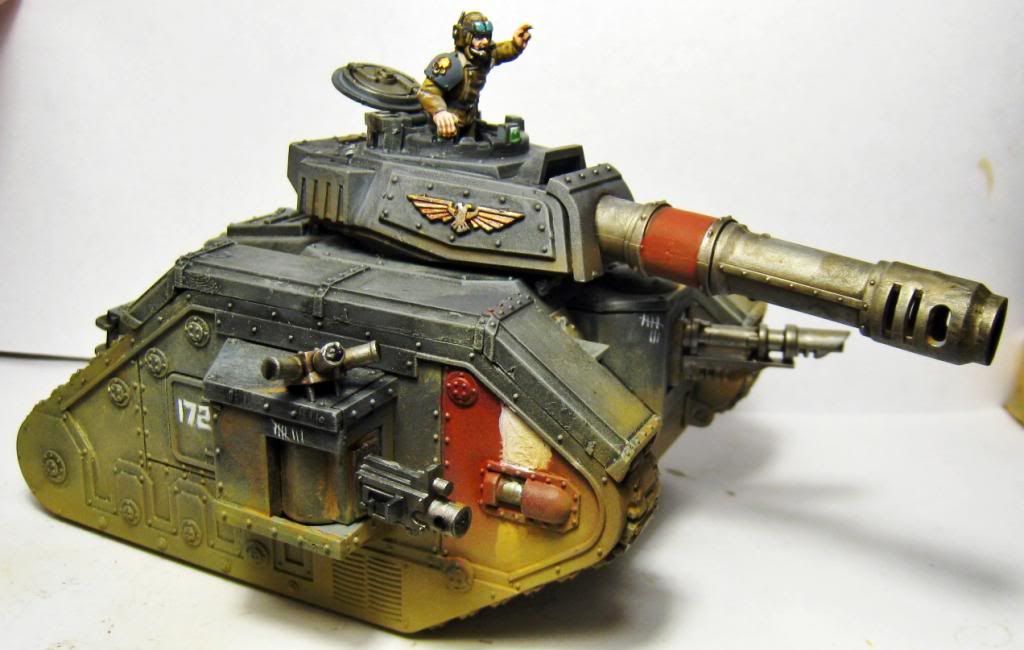
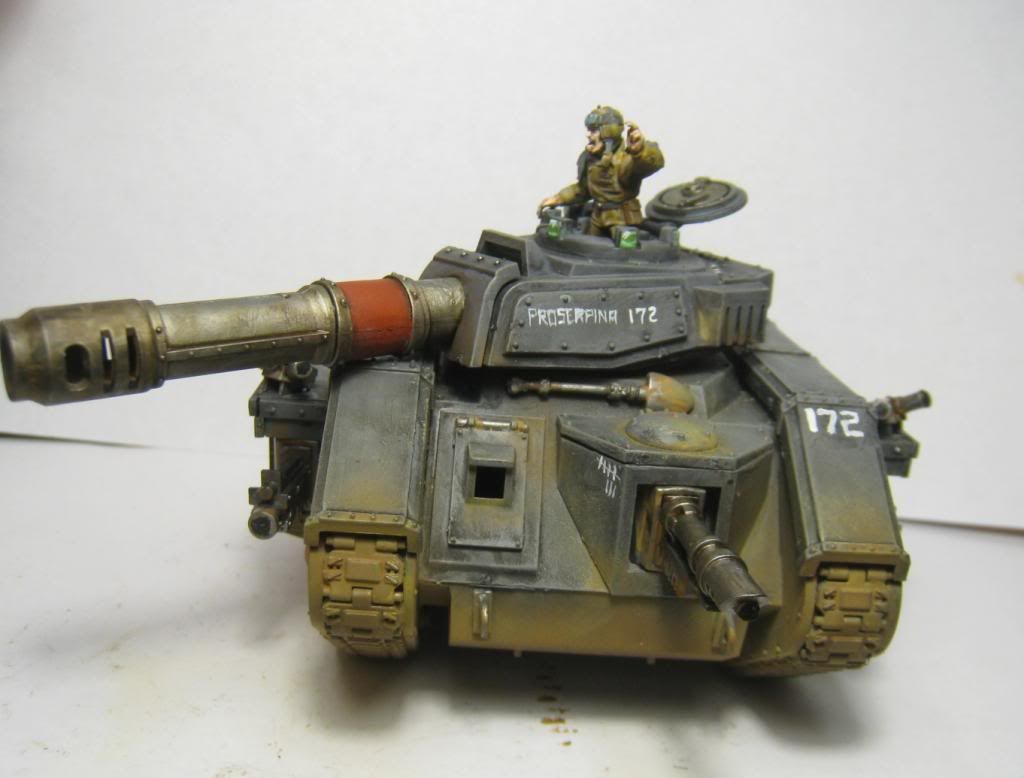
So, let’s
look at the final stages of painting the Imperial Guard Leman Russ battle
tank shown above. After painting it, drybrushing it to define the armor plates, and
applying some rust effects using some orange-brown paint and a number of
washes, it’s time to apply the initial grit and grime.
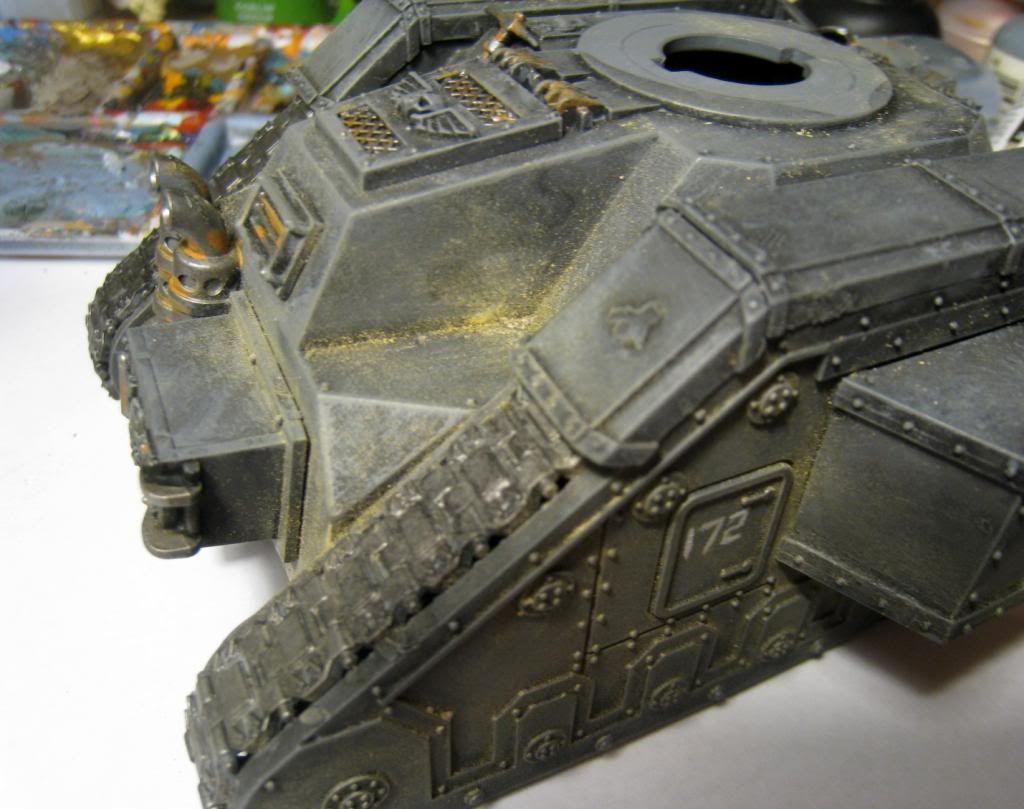 |
| Weathering pigment applied into the recesses around the vehicle. |
To
begin weathering a model above and beyond what is possible with just brushing
on some various shades of browns, I get out my weathering powder set. I have a
set from Tamiya, but Forge World and Secret Weapon Miniatures make similar
(and, as it turns out, much more accessible) products. They all work basically
the same way. You take a fairly large old junk brush, and get some pigment on
it. Then you dab it on the model where you want the pigment to go. Remember,
precision in application makes it look less realistic, which is why I use a
large brush.
Now
that we’ve got some pigment in the recesses and around where grit and grime
will collect, I get out my airbrush. I blow some air on the model to brush off
any excess weathering pigment, and then load the brush with the darkest color
of brown that I want to apply to the model.
In the image shown, I’m propping the model up with a paint pot, but that’s
not necessary—just hold the tank at an angle so that the airbrush sprays paint
onto the model in a direction that mud and dirt would naturally hit the vehicle
as it moves forward.
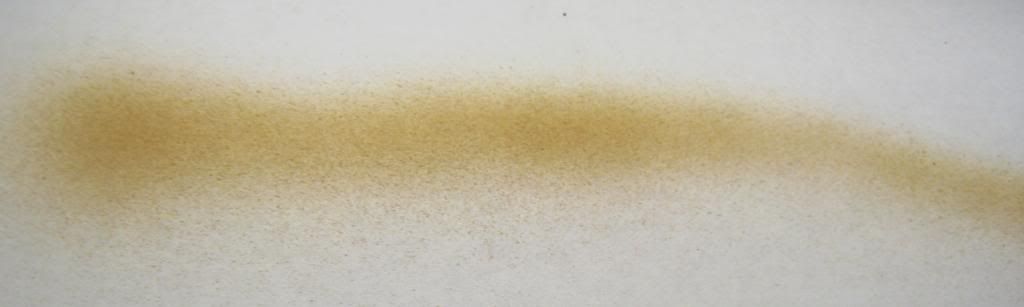 |
| This is roughly what the spray should look like. |
You
want to have a fairly large spray pattern, with a relatively low density. Go over each area with the airbrush until you
have the beginnings of a dirty look, focusing particularly around the bottom of
the vehicle, the treads, and underneath any outcroppings such as the sponsons.
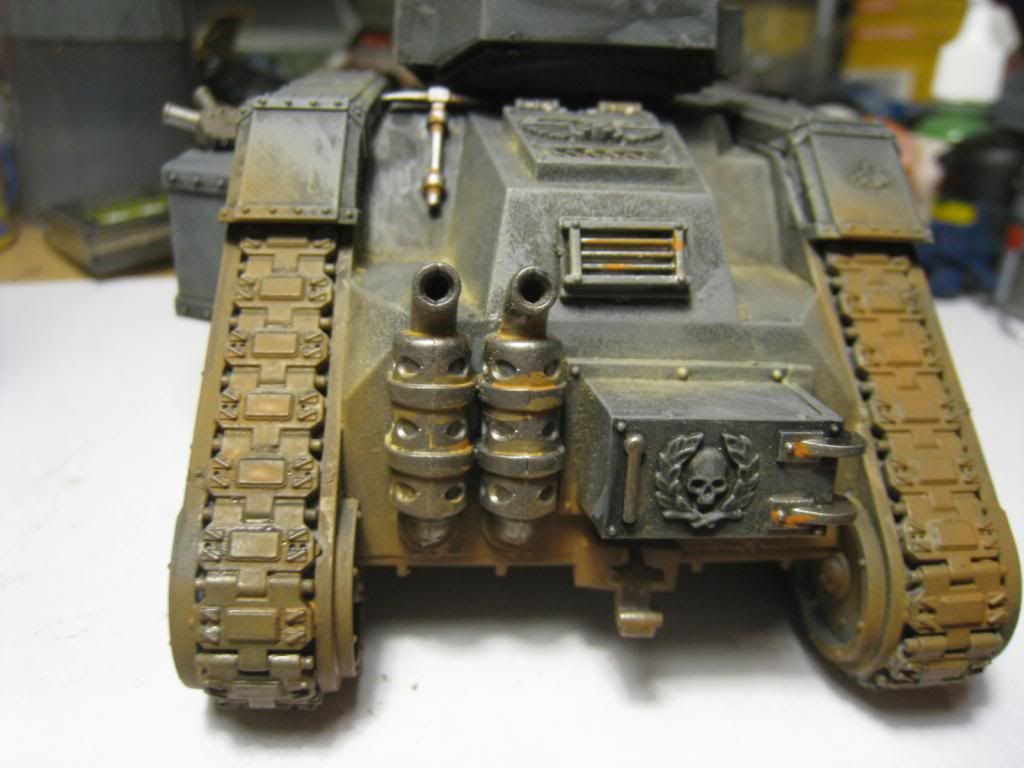 |
| After applying the first brown layer, you should have something along these lines. |
Then,
select a lighter shade of brown, or mix in a bone color such as RMS Aged Bone
or GW Ushabti Bone with your first color. Tighten the spray pattern, but keep
the same air flow and spray density. Go over the areas from the last step using
this lighter color, but keep the application closer to the edges of the model.
The airbrush will naturally blend the colors, and specks of the lighter color
will provide both a convincing dust effect and the appearance of mud splatter.
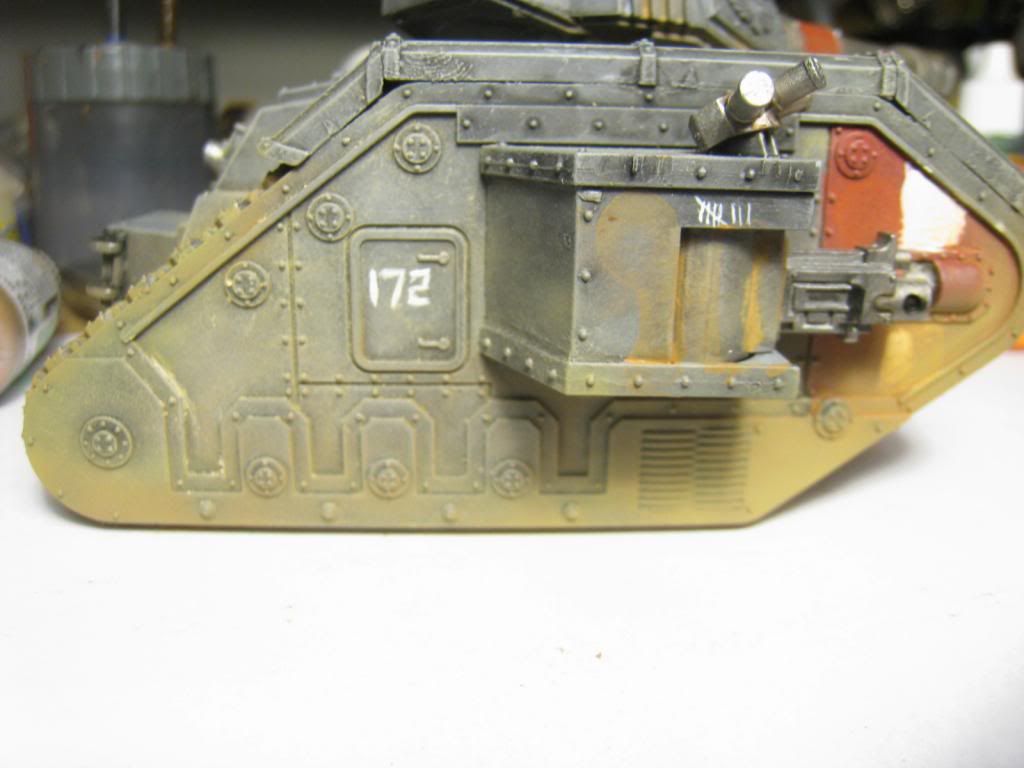 |
| After the second layer, focusing around the edges of the treads and covering parts of the first layer. |
That’s
it. Easy, right?
No comments:
Post a Comment